|
General Utilities
 Print
File Manager
Download trial Buy Now Print
File Manager
Download trial Buy Now
About
Print File Manager, searches for print (PRN) and plot (PLT) files on the
specified drives and folders, it sends batches of print and plot files to
any printer or plotter on your system or network; an indispensable
application to every CAD manager.
The application features several modes to select files, notably: drag and drop,
specifying Excel lists, or specifying folders.
It is designed to save time and money, it is easy to use and
preserves user's options for the next time it runs.
Features
- 3 modes to select files to be
printed/plotted:
drag and drop files from Windows Explorer,
plot from an Excel document list,
plot all documents from specified folders,
- All settings are saved between sessions
Usage
-Start the application by browsing the
menu: All Programs, Office Optimum, Print File Manager.
Then, please
follow these simple instructions describing
each item on Print File Manager interface:
-Print Devices window lists the
available printers and plotters. Click to
select the desired item in the list.
-Print Files Selection; there are
3 modes
to select files. Click on the
tab corresponding to your needs:
1.Drag and Drop files from Windows Explorer to
the program interface.
If you change your mind, you can double click to remove
some of the files from the list.
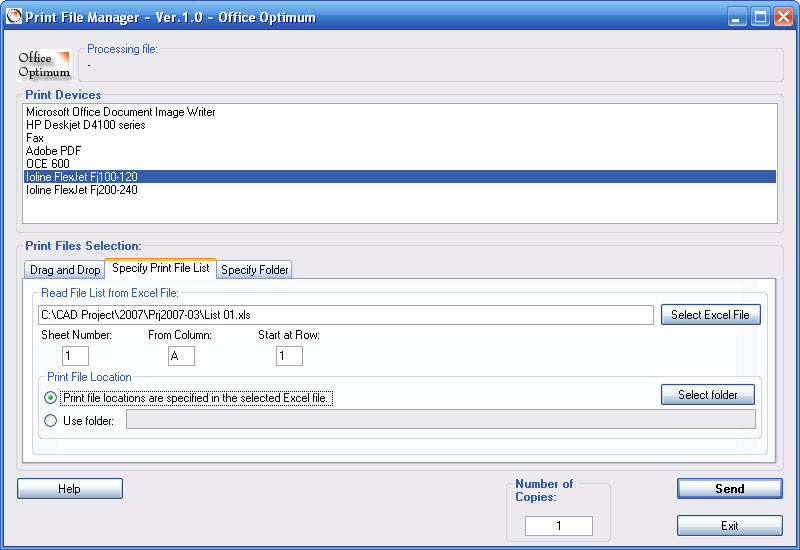
2.Specify Document List from an Excel file. To
use this mode you first need to have the
print file list open in Excel, then to click
Select Excel File button; a window will
open showing all open Excel files. Select
the appropriate Excel file. Next, enter the sheet
number where the list is located in the
Excel file (ex.: enter 1 if the list is in
the first sheet). Specify the column
to read from in the From Column field
by entering the column letter or column
number.
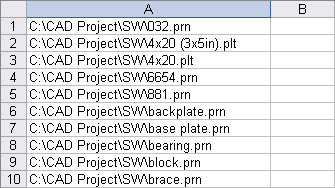
If the paths of the print files are included in the
list, select Document locations are specified
in the selected Excel file option. This
is an example of such list:
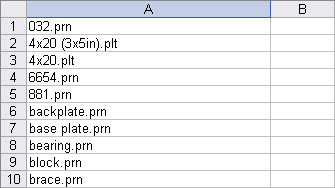
If the paths of the print files are not included in the list,
select Use folder option and click
Select folder button to browse to the
folder where print files are located.
This is an example of such list:
At the end of the batch process, the cells
in the Excel file will be marked in green
and red; files successfully sent to the
printer/plotter will be
marked in green, files not found in red and
duplicates will be left unchanged.
Note
that duplicate files in the Excel list will
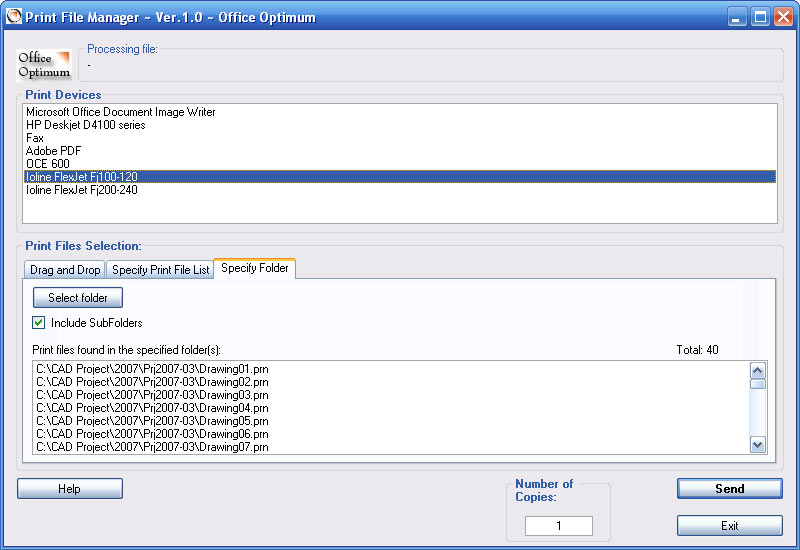
not be printed. 3.Specify Folder mode. To use this
mode, first decide if you need to check the
Include SubFolders or not. Then,
click Select folder button and browse
to the folder where print files are located.
At the end of the search, all files with the
extensions .plt and .prn will be listed in the
lower window. Other file types will be
ignored. You can click Select folder
button again and add other files to the
list. If you wish, you can double click to remove
some of the files from the list.
-Next, select the Number of copies. -Click
Send button to start
sending files. You can click the Exit/Cancel button to stop a running
process.
Screenshots
Drag and Drop mode

Specify Print File List mode
Specify Folder mode
System requirements
Operating System Windows 2000, Windows NT, Windows XP
Microsoft Excel 2000, XP or later
Microsoft .NET Framework 2.0
(included in the package) |
